Do you wish there were trigger thumb exercises to make those painful pops go away?
Trigger thumb is a frustrating condition that manages to sneak into your daily life, disrupting your daily activities, work, or play.
This snapping, catching, and locking can leave you wincing in pain.
Well, the good news is that you don’t have to put up with it! I’m here to help you naturally heal your thumb with my top 3 trigger thumb exercises.
For your convenience, you can also watch me demonstrate these exercises on my YouTube video here-
Before we dive into the exercises, here are a few essential tips to start you on the right path:
-
Get a Proper Diagnosis:
First things first, make sure you have a proper diagnosis from a hand surgeon. While it may seem like trigger thumb, other conditions can mimic its symptoms, and different diagnoses require different treatments.
Don’t jump into exercises without knowing what you’re dealing with.
-
Know Your Stage:
Trigger thumb doesn’t come in a one-size-fits-all package. It has four stages, also known as grades, and understanding which stage you’re in is crucial.
Stages 1 and 2 often respond well to conservative treatment, but as you advance to stages 3 and 4, it can be harder (but not impossible) to treat.
-
Avoid Popping or Snapping:
Over the next six weeks, steer clear of any thumb triggering. Every time your thumb locks or catches, it’s adding fuel to the inflammation fire.
And that’s what trigger thumb is all about—a tendon swollen due to the thickened synovial fluid around it, making it too beefy to slide through the pulley system.
So, with these tips in mind, let’s jump into the top three trigger thumb exercises:
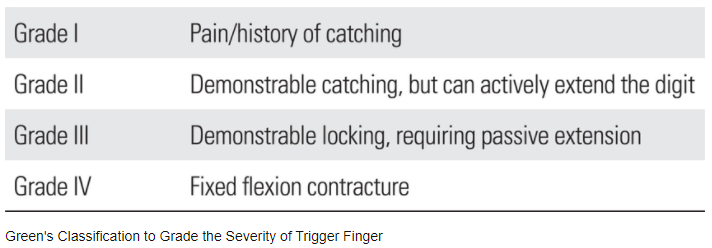
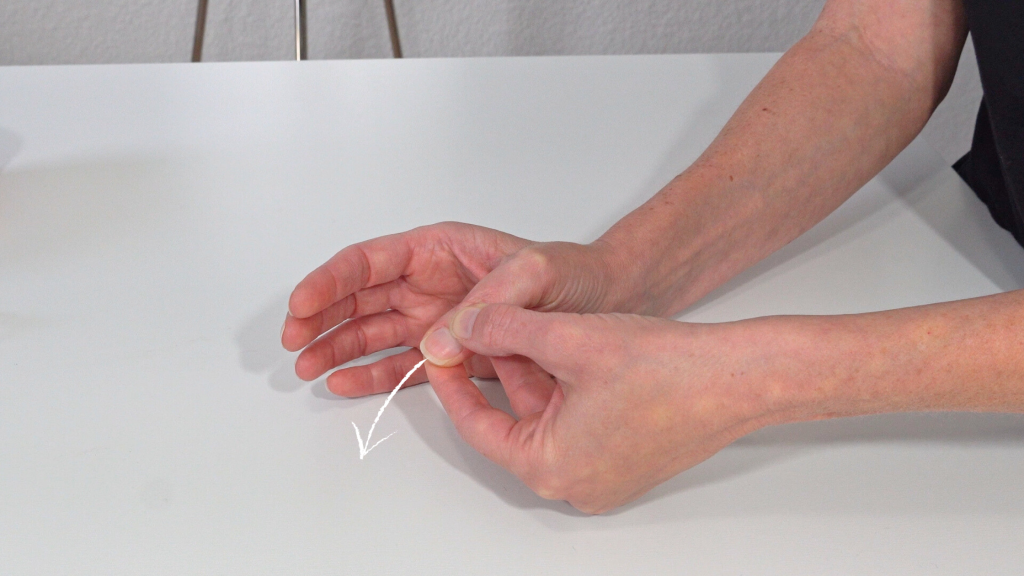
Exercise 1: The Thumb Stretch
Step 1: Take off your splint or brace, and lay your hand flat.
Step 2: Next, grab the tip of your thumb and gently pull it outward to open up that web space. Avoid hyperextending the middle joint.
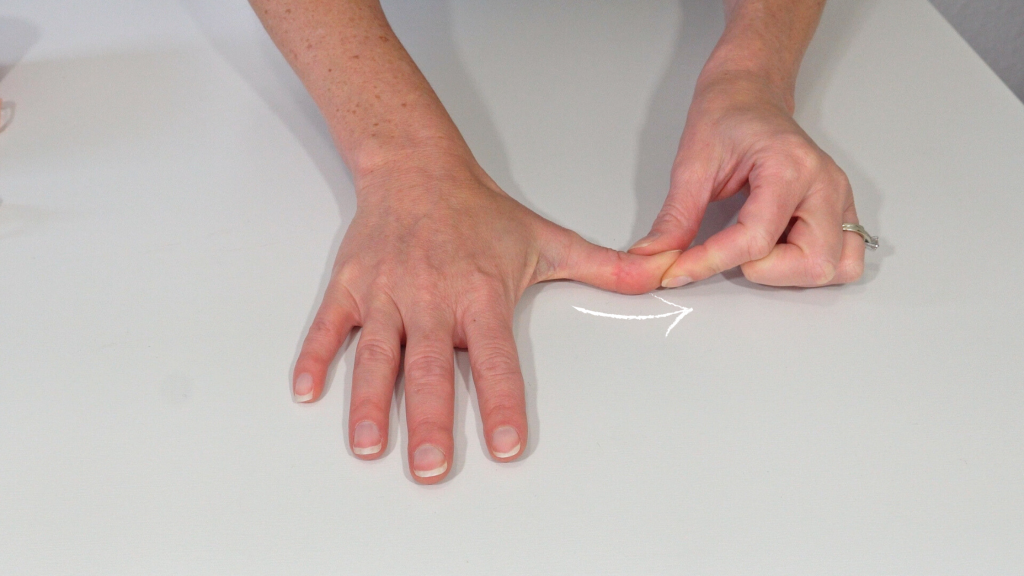
Step 3: Lift your thumb, focusing on the opposing muscle group (extensors). Hold for a few seconds, then relax and bring the thumb to the side of your index finger.
Step 4: Repeat this sequence about 10 times, 2-3 times a day. No pain, no triggering, no catching. Keep that thumb moving!
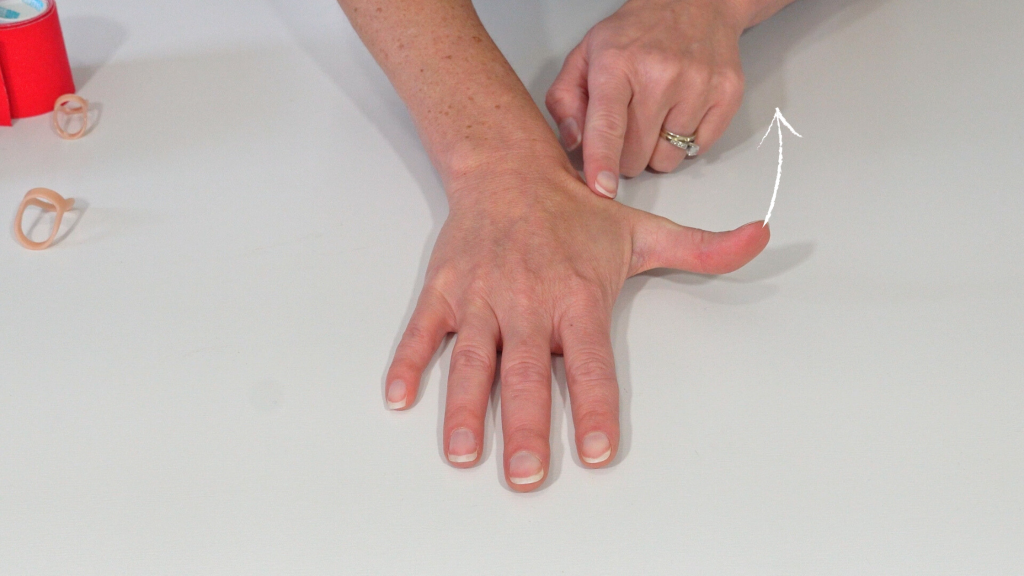
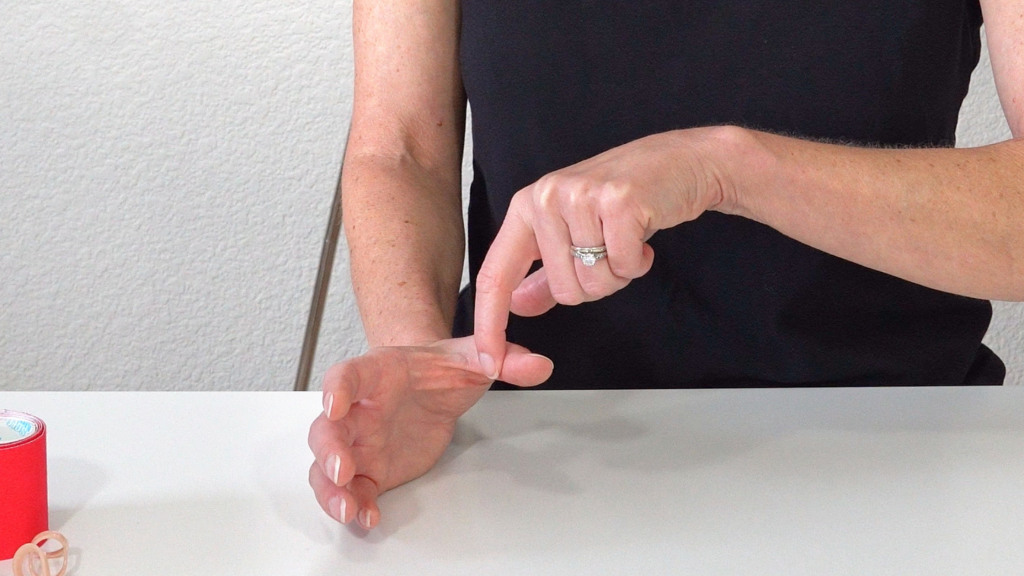
Exercise 2: Passive Stretching
Step 1: With the splint off, place your hand in a thumbs-up position.
Step 2: Using your other hand, push the tip of your thumb into extension, then slowly stretch it down into flexion. Lightly, passively bending all the joints of your thumb, if possible.
Step 3: Your hand and thumb should be completely relaxed throughout. Hold for a few seconds. Repeat this sequence about 10 times, 2-3 times a day.
Step 4: Gradually stretch deeper with each repetition. Most importantly, make sure you do not actively flex your thumb or you will trigger.
This passive trigger thumb exercise prevents joint stiffness caused by immobilization from splints, rings, or tape.
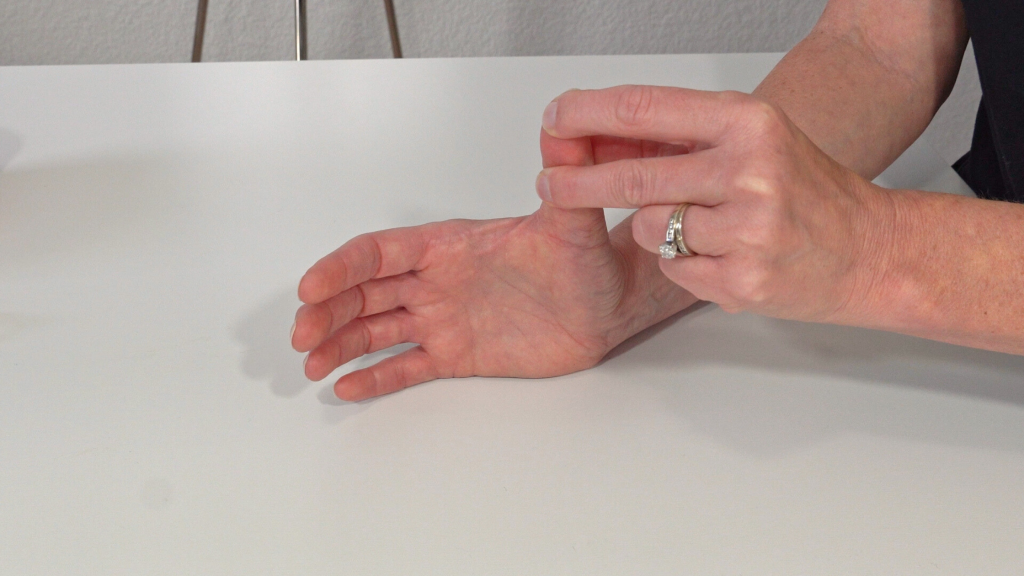
Exercise 3: Isometric Contraction
Step 1: Rest your hand on the table, small finger side down, with your thumb slightly abducted in a ‘C’ position.
Step 2: Using your other hand, place 2-3 fingers on the pad side of the tip of your thumb. Press up with your fingers and press down with your thumb.
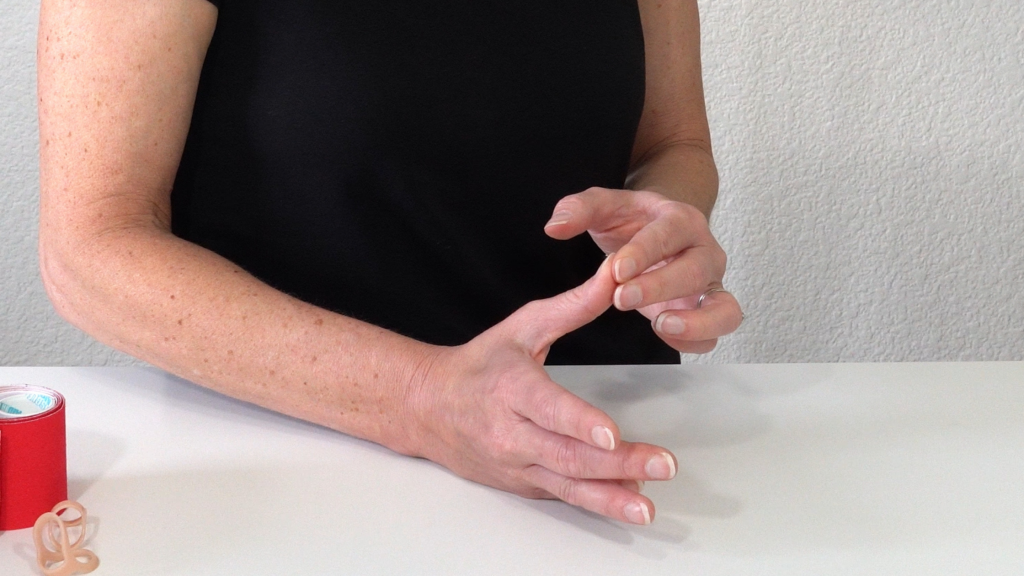
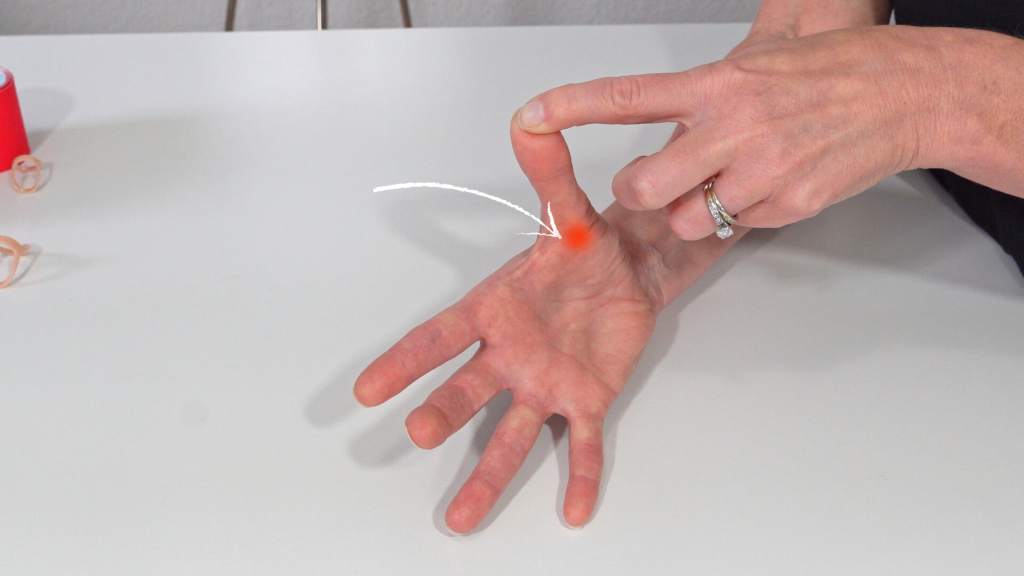
Step 3: Provide light to moderate resistance to the tip of your thumb only. Keep your thumb as still and as straight as possible, holding the contraction for 5 seconds.
As a result, you should feel the contraction along your thumb Flexor Pollicis Longus (FPL) tendon where the pulley typically snags.
Step 4: Repeat 10 repetitions, 2-3 times a day. Remember, no pain, no catching, and not too much force. Keep in mind, we’re strengthening your thumb…not your bicep!
Conclusion:
Finally, after completing all 3 of these trigger thumb exercises, put your splint, or brace back on if you’re using one. You can also perform these exercises with tape on. As you can see, exercises are an effective, natural strategy to heal your thumb. However, don’t forget to maintain a ‘no pain, no catching’ rule during your exercises. That’s it!
Follow these exercises diligently for 6 weeks, and you’ll be well on your way to unlocking your trigger thumb.
And if you’re looking for more comprehensive help, such as what to do after 6 weeks, or how to prevent trigger thumb from returning, consider joining a program specifically designed to tackle your trigger finger or trigger thumb troubles. Learn more about Unlocked: Fix Your Trigger Troubles here.
Let’s bid farewell to that annoying snapping thumb, and say hello to all those activities you get back to doing!