In this blog post, I am going to guide you through my Top 5 Hand Strengthening Exercises For Stronger Hands.
Let’s face it, our hands do so much for us from the moment we hit the snooze button in the morning, to the moment we pull up our covers at night. And so much more!
Our hands write, type, and text; cook, bake, and clean; they button, zip, and lift; and hug, hold, and squeeze. This is just a few of the hundreds of tasks you use your hands for on a daily basis.
If you prefer video, you can watch my Top 5 Hand Strengthening Exercises For Stronger Hands from my YouTube channel here:
THEY ARE OUR TOOLS TO HELP US FUNCTION THROUGHOUT THE DAY.
It isn’t until we sustain an injury or start having aches and pains when we FINALLY decide to do anything for them.
Sometimes we notice a grandparent’s deformed hands and start to think about taking better care of of our own hands.
Isn’t it time to start caring for your hands like you do those washboard abs?
Why Do We Need To Do Hand Strengthening Exercises?
BUILD GRIP AND PINCH STRENGTH
REDUCE JOINT PAIN AND STIFFNESS
IMPROVE HAND ENDURANCE
IMPROVE DEXTERITY AND FINE MOTOR COORDINATION
REDUCE RISK OF HAND INJURIES
Since our hands do so many activities without us even thinking; it’s important to keep them strong so they can withstand stress and strain.
Keep in mind, if you don’t have full range of motion of your fingers, then you should work on mobility first. You don’t want to strengthen your hands in a limited range of motion.
However, if you have full mobility then these top 5 hand strengthening exercises can help you build your grip, improve hand performance, and reduce your chance of painful hand injuries.
Remember, these should not be painful. You may notice your fingers getting tired or a little sore but if you have sharp pain you should slow down or discontinue.
(These hand exercises are not to be used in replacement of medical advice; always consult a physician before starting this or exercise program. See our disclaimer.)
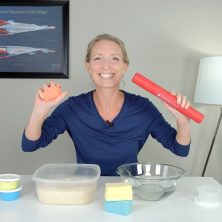
You will need only two pieces of equipment to get started. Therapy Putty and a thick rubber band. If you don’t have putty then use a squishy ball. The Therapy Putty used in this post is a light resistance. Putty comes in different colors which indicate different resistances. You can find therapy putty here in our store or here on Amazon (these are affiliate links).
Hand Strengthening Exercises
#1: Putty Grip and Squeeze
I like using the putty versus a ball because you can squeeze all the way through to your palm.
A ball blocks your movement and only allows you to strengthen within a limited range of motion. Also, as you manipulate the putty in your hand this can work on dexterity and coordination of the fingers and thumb.
Hold the putty in your hand and squeeze it into your hand until your fingertips reach your palm, then release and manipulate the putty in your hand and prepare to squeeze again. Set a timer for 2-3 minutes or repeat 20 times.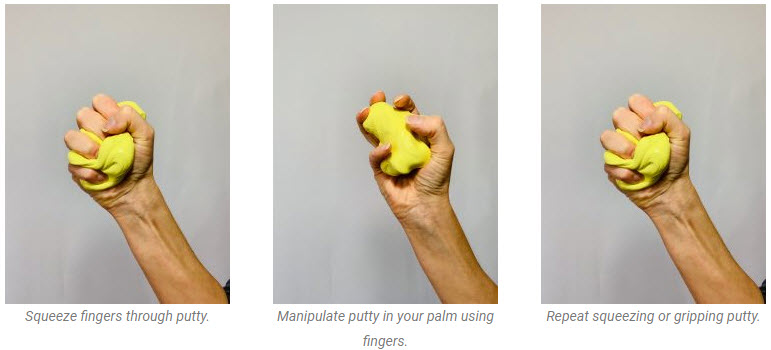
#2: Thumb Pinch Strengthening
So many hand strengthening exercises forget the thumb. I will never understand that because our thumb is half our hand function! If you don’t have strength in our thumbs you won’t be able to pinch open bags or bottles or lids.
Using the putty, roll it out into a ‘hot dog’ shape about 1-2 inches thick. Using your index finger and thumb, pinch along the putty, making little indents along the length of the putty.
Do this 10-20 times. Change up the type of pinch by placing your thumb on top and pinching toward your index finger. Again do this 10-20 times. Try different pinches with your thumb for a total of 2-3 minutes.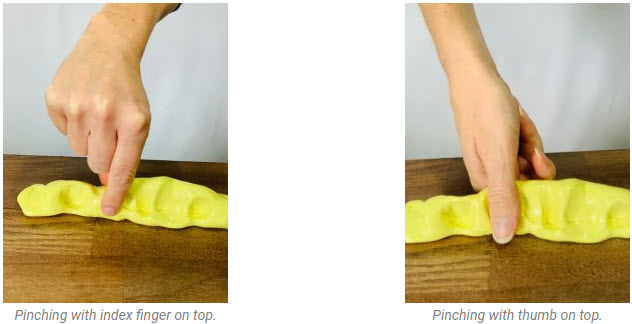
#3: Isometric Hooks (Claw)
You do not need any equipment for this hand strengthening exercise. All you need is your other hand to help. An isometric exercise is when you contract a muscle without moving; using the maximal voluntary contraction.
For this exercise, place your fingers in a hook fist, then clasp, or hook, the fingers together at your chest. One hand will be facing palm up and the other will be facing palm down.
Once your fingers are clasped together, use your arms to pull in an outward position while maintaining your hook fists. Hold for 5 seconds then relax. Repeat 10-20 times with right hand on top then switch to left hand on top, repeat.
This is not only great for the fingers but also for the whole upper body!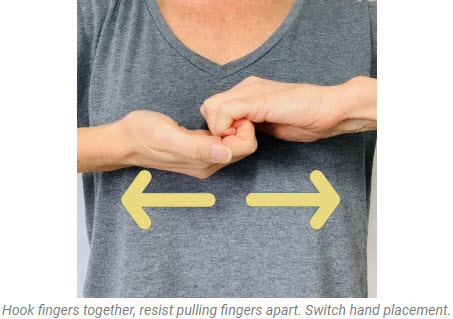
#4: Rubber Band Abduction
Place the rubber band over all four fingers. Do not include thumb. Now spread your fingers apart as far as you can, hold 5 seconds then relax. Repeat 10-20 times.
This exercise is great for intrinsic hand strengthening because it targets the muscles of the hand that lie deep between the fingers.
You should see the muscle near your index finger plump up. You can also try this with the putty by making a loop around your fingers.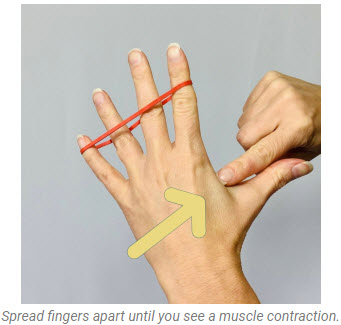
#5: Rubber Band ‘C’ with Fingers and Thumb
Place the rubber band over all four fingers and your thumb. Keeping your fingers together, open your thumb out to the side into a ‘C’ position (not thumbs up position).
Make a ‘C’ with your fingers and thumb, hold 5 seconds then relax. Repeat 10-20 times. Your thumb and fingers should look like you are opening your hand to hold a cup or can of pop.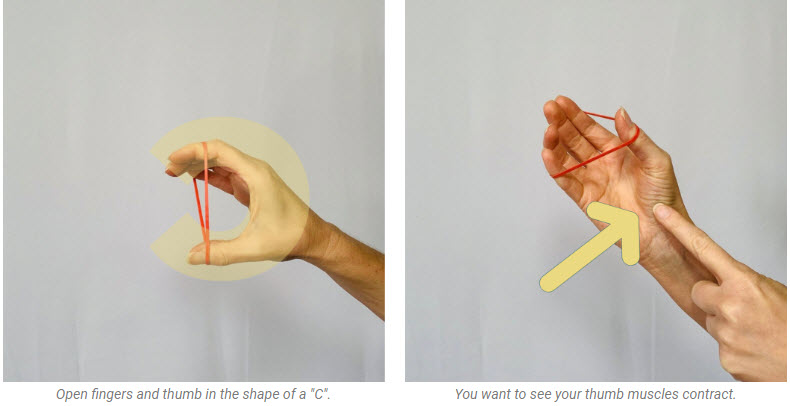
DONE! These exercises can be performed 1-2 times a day. You can do them at work, watching tv, or waiting to pick up your child from practice. Just don’t leave the putty in a hot car!
If you want more finger mobility and hand strengthening exercises, then you will want to enroll in my Get a Grip Program.
CLICK HERE TO LEARN MORE
If you have found this article helpful, do us a favor and share on our social media channels!