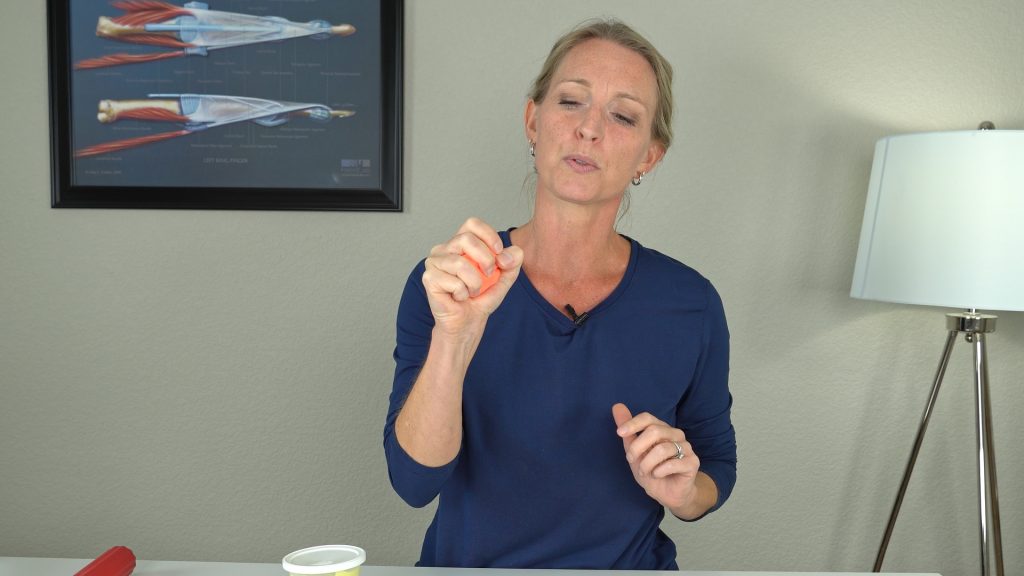
In this blog post, I’m going to teach you my top 5 exercises to build grip strength after a distal radius fracture.
Hand strength can take several months, if not a whole year, to fully recover.
That is why these exercises will start from the beginning of your grip strength journey where you need lighter, gentler exercises and progress in difficulty.
Typically, as time goes on you’ll feel stronger and stronger. Therefore, I’ll share some tips to upgrade each exercise.
Here’s a list of the equipment you will need to do these 5 exercises to build grip strength after a distal radius fracture.
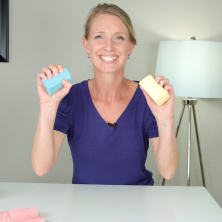
1. Two Slo-Foam™ hand exercisers
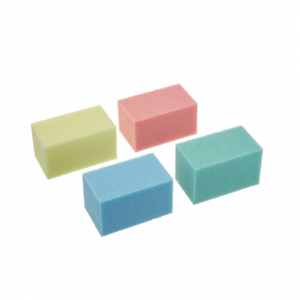
I will use two different resistance levels, an extra soft yellow and a medium resistance blue. You can use a kitchen sponge if you don’t have the foam. This is the memory Slo-Foam™ I’m using in this blog post.
2. Bowl of water

Fill up a bowl with warm water. We will be gripping the Slo-Foam in water. You’ll like this one!
3. Bowl of rice
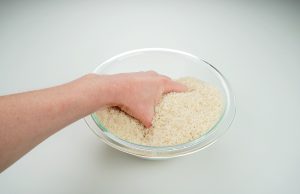
I’ll be using 3 pounds of rice in a bowl.
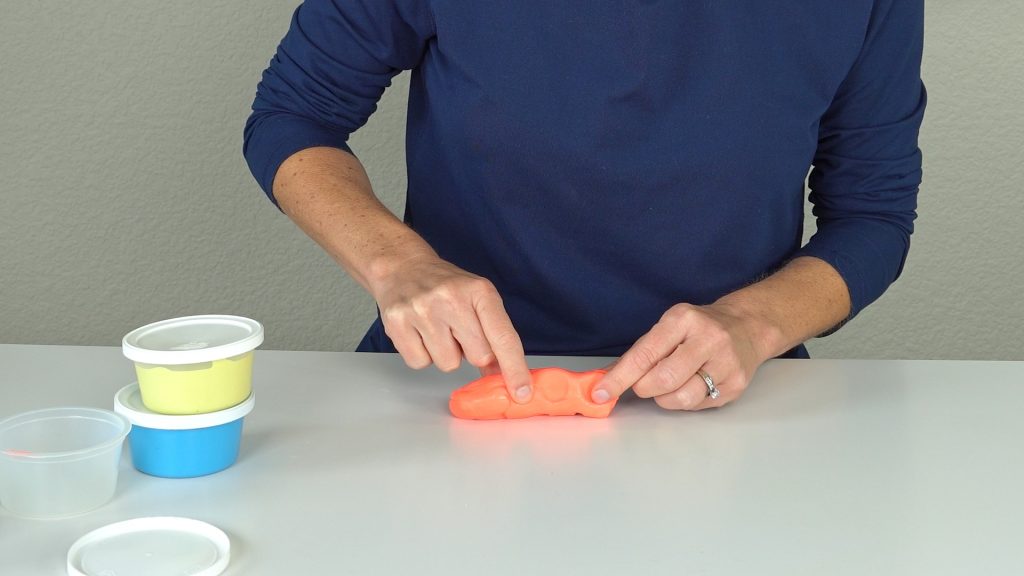
4. Putty
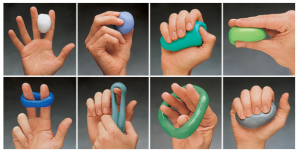
For this post, we will use the red putty which is a medium resistance. Here are a few places to find putty. These come in extra soft, soft, medium, and hard firmness.
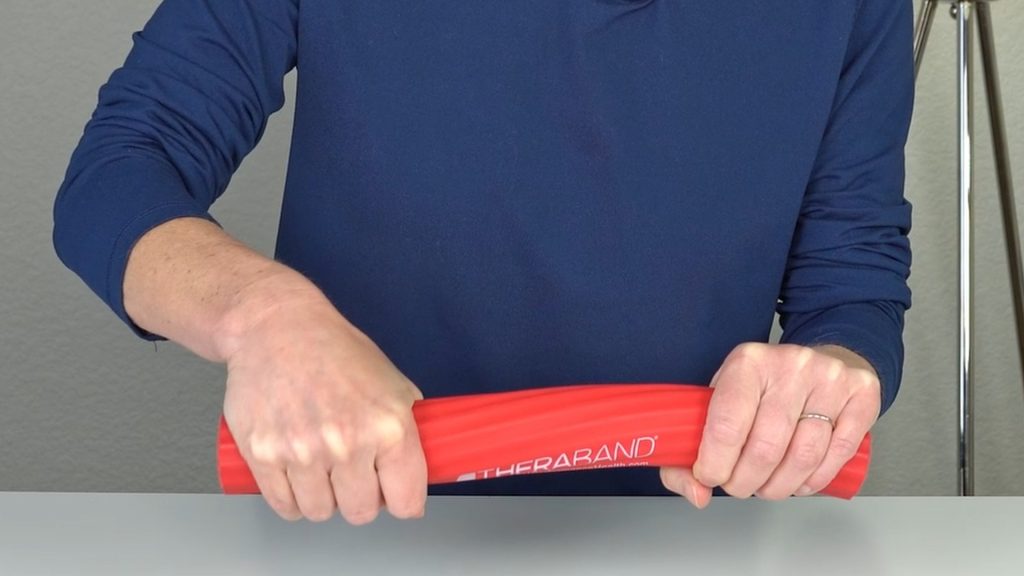
5. Flexbar
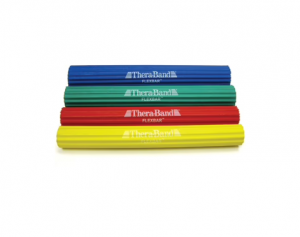
I have the red medium resistance Flexbar. You can use whichever resistance level is right for you. Don’t have one? You can find them in my store here.
If you prefer video, watch these 5 exercises to build grip strength after a distal radius fracture on my YouTube channel here:
Disclaimer: Always check with your doctor before you start these exercises or any exercise program.
Build Grip Strength after a Distal Radius Fracture Exercise #1
Slo-Foam Hand Exercisers
In this first grip strength exercise, you will need a bowl of water and the extra soft yellow Slo-Foam™ block, or a kitchen sponge.
A quick tip is to use warm water, or heat the water in the microwave. Warm water helps increase the mobility of stiff achy joints.
Making it a great way to loosen up your fingers before you start your grip strengthening exercise.
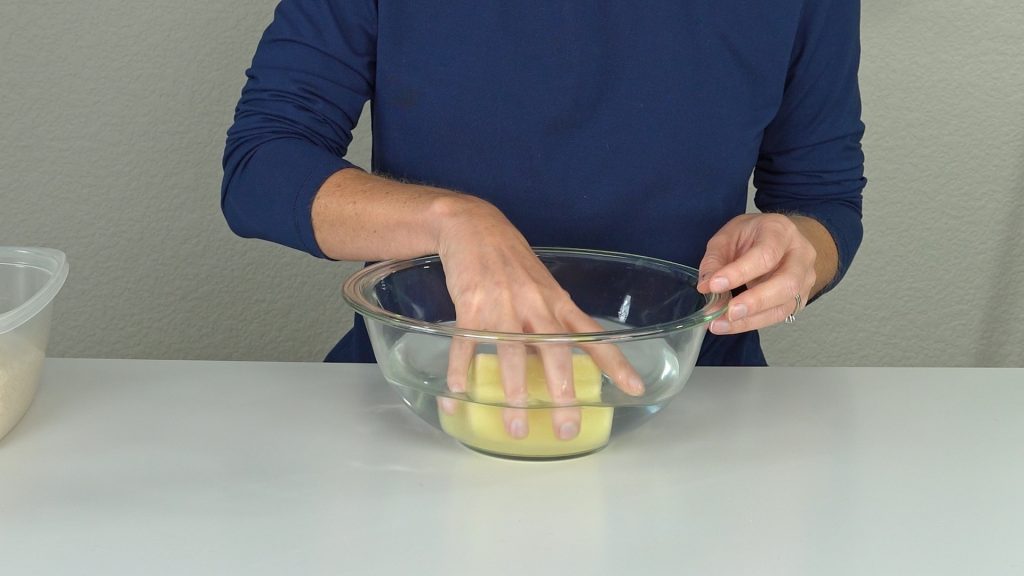
Use the foam in warm water
Place the Slo-Foam™ block in the water and begin lightly grasping it. Next lift the foam block out of the water and then place it back down.
The block will absorb water making it heavy for some people. So if grasping and picking up feels difficult then you could stay with this exercise.
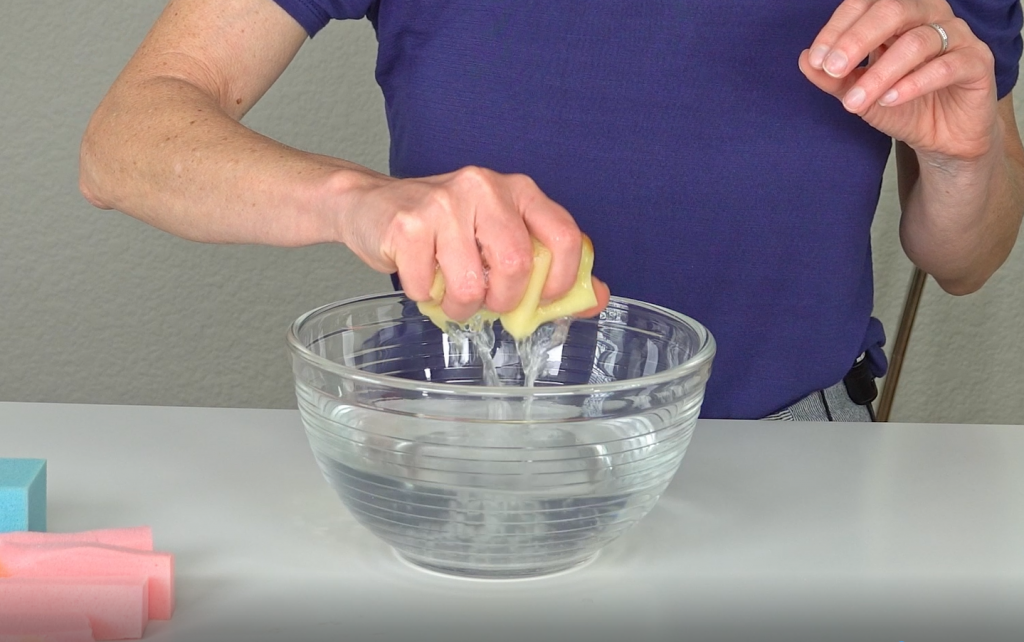
To progress, squeeze all the water out of the foam. This will make the foam lighter while also working on your grip.
Repeat by placing the foam back in the water and squeezing the water out again. Repeat this process for 3-5 minutes or 10- 20 repetitions.
How to Upgrade this Exercise
To build more grip strength, go a little faster. Pick up the foam and squeeze. Flex your fingers as much as you can trying to get all the water out. You can do this in or out of the water.
Continue for 3-5 minutes.
Another way to add difficulty to this exercise is to change positions of your wrist and forearm. Get the foam completely soaked with water, turn your palm up and squeeze the water out.
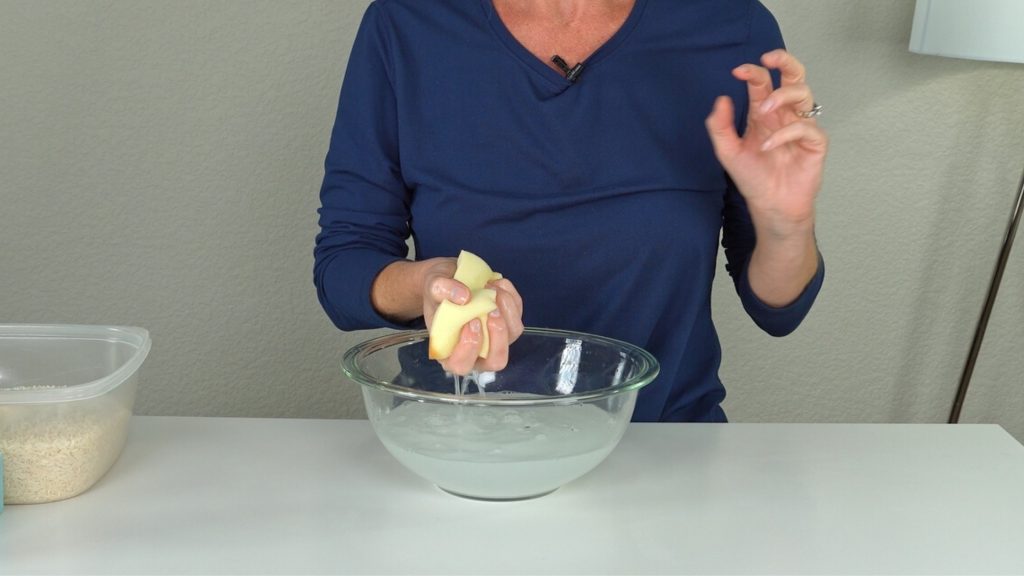
You may notice your grip strength changes.
Work on squeezing the foam with your forearm palm up, pam down, or in a neutral position.
These exercises transfer into increased grip strength for all the functional tasks you do throughout the day.
If you enjoyed that exercise you’ll want to learn more ways to use the Slo-Foam™. Head over to my blog post How to Start a Beginner Hand Strengthening Program with Foam.
Build Grip Strength after a Distal Radius Fracture Exercise #2
Rice Grasping
Who knew you could build grip strength after a distal radius fracture with a common item found in your pantry.
Rice is inexpensive and dense. It can be used for grip strengthening, scar desensitization, and more.
For this exercise, get yourself a large bowl and fill it with rice. You’ll want enough to cover your fingers and to grasp large handfuls.
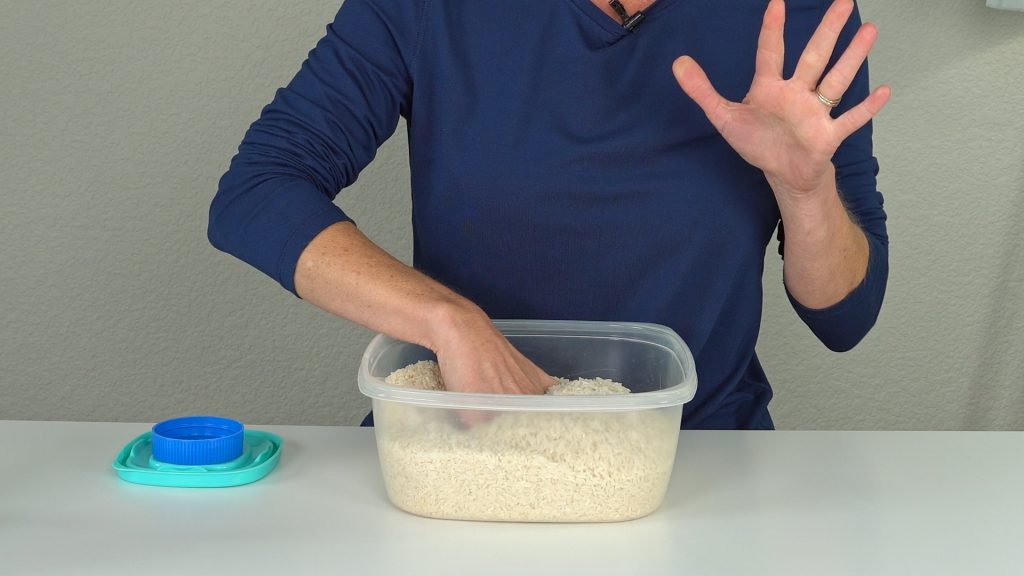
I recommend around 3 pounds. Place the rice in a bowl with a lid so you can use it again and again.
Just like water exercise #1, you can put your dry rice in the microwave for about 60 to 90 seconds.
The warmth feels so good on those achy finger joints.
You’ll forget you’re working on your grip strength!
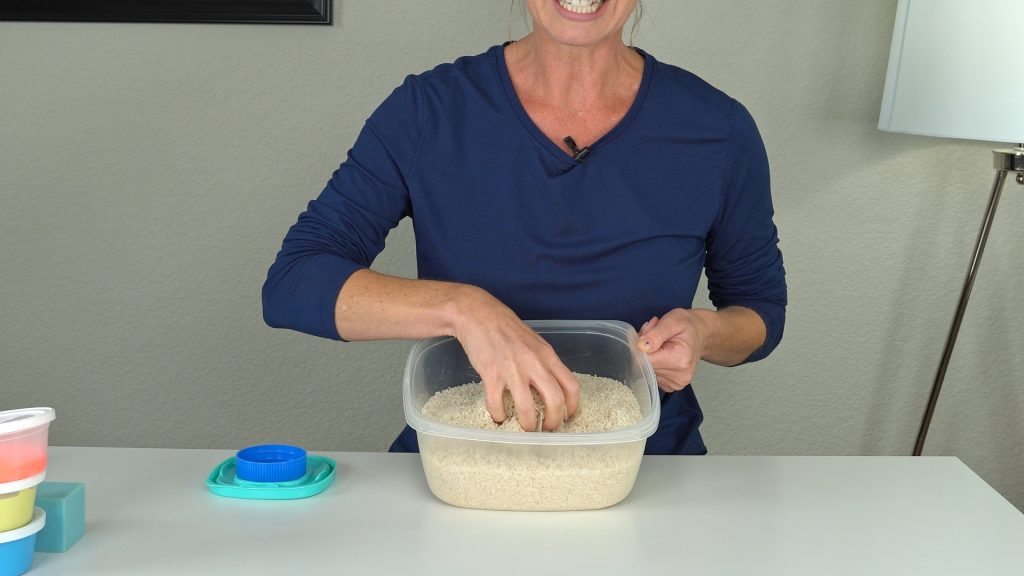
How to strengthening with rice
Start raking and flexing your fingers and thumb through the rice. Do this a few times, then dig deeper into the rice and extend your fingers as you lift up through the rice.
You can go slow or fast, whichever feels good for you.
But make sure to open your fingers and thumb wide. Next, try grabbing large handfuls of rice.
Release the rice and repeat.
How to Upgrade this Exercise
To make this exercise a little harder, start moving faster.
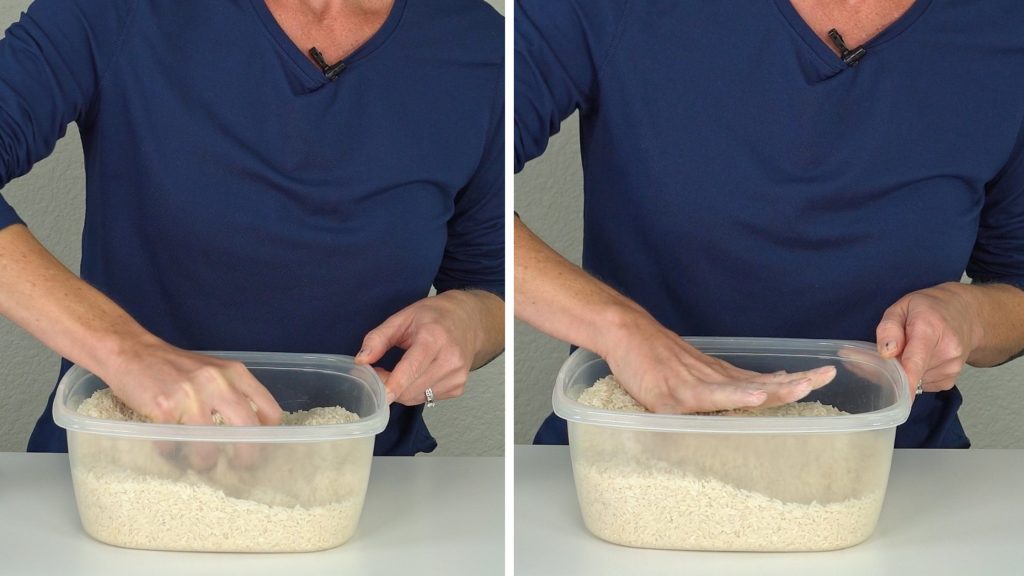
Really dig into the rice.
As you get a handful of rice move your wrist in a clockwise and counterclockwise position.
Making daily activities such as opening a jar or doorknobs a little easier!
One more upgrade to this exercise, is to use different sizes of plastic lids from your kitchen.
This can help increase your strength with various activities around the house such as holding a book or carrying a plate one handed.
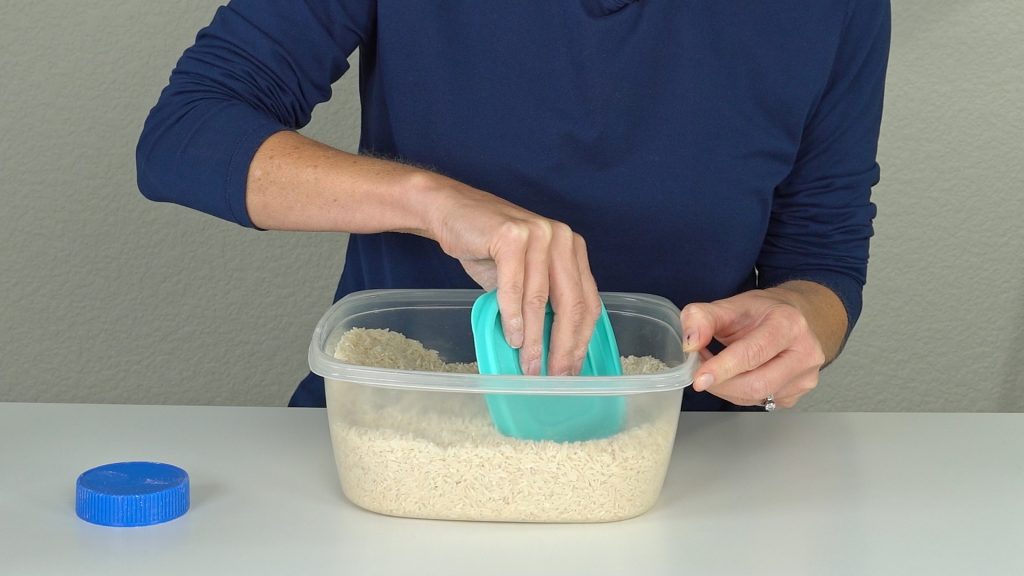
To do this, hold the lid with your large knuckles and thumb. Keep your smaller finger joints straight. This type of grip is called a lumbrical grasp.
Use the lid to push and pull through the dense rice.
Set a timer for 3 to 5 minutes with this exercise.
Build Grip Strength after a Distal Radius Fracture Exercise #3
In Hand Grasp and Manipulation with Slo-Foam Hand Exercisers
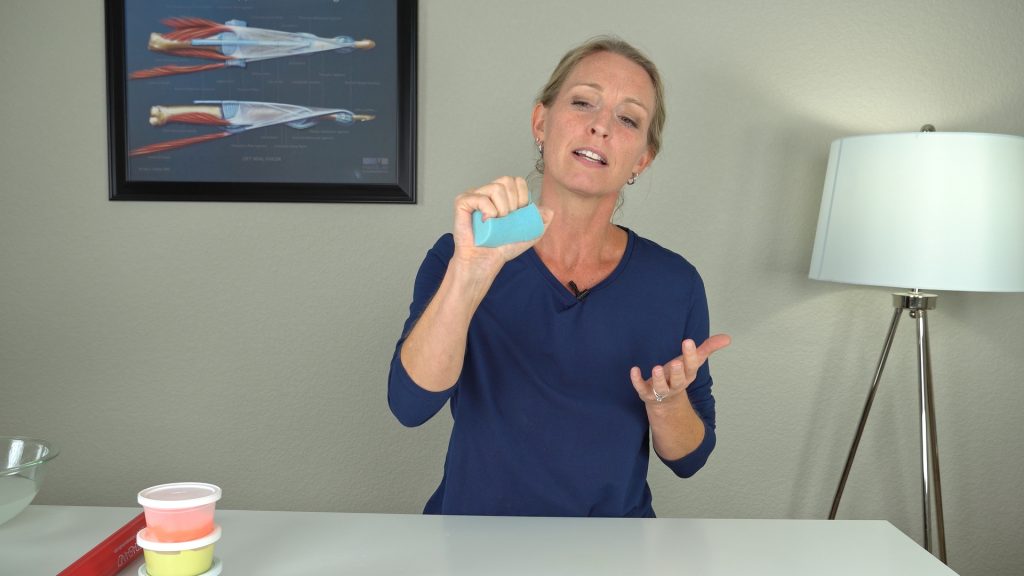
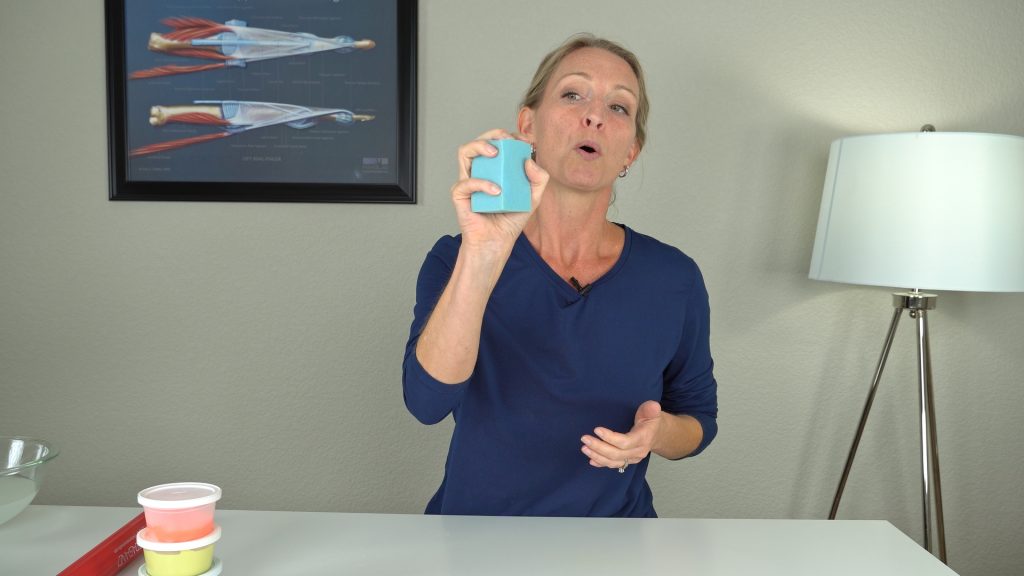
Beginner grip strength exercise 3 uses the blue medium resistance Slo-Foam™. This is more dense and a good progression from the rice.
To start strengthening with the Slo-Foam™
For this exercise, start squeezing and rotating the foam around in your hand.
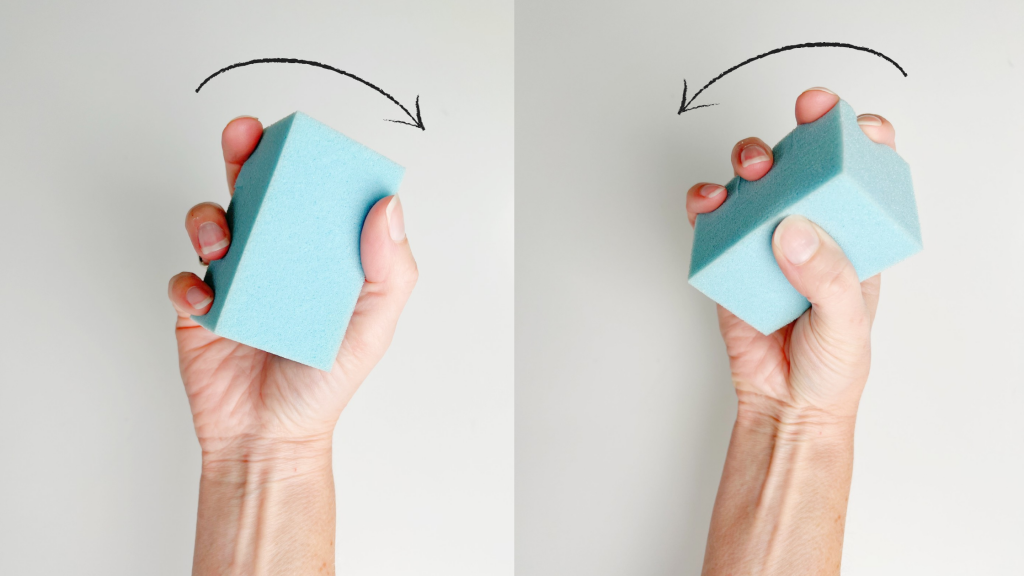
Turn the block horizontally in your hand and squeeze.
This works on improving your grasp when holding smaller objects.
Next, manipulate the foam in a vertical position when squeezing.
Allowing you to strengthen your hand using a larger grasp.
The unique shape of the foam block allows you to work on your grip in a variety of ways.
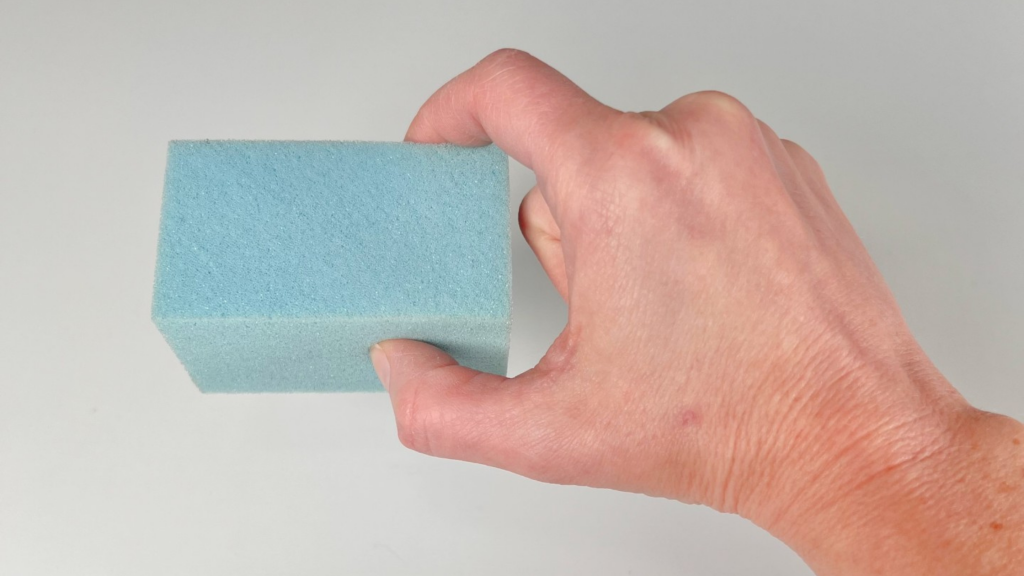
To add on to this exercise, begin using your thumb more by pinching into the foam.
Don’t forget your thumb is 40% of your hand use. So you want to make sure you strengthen your thumb too.
Place the Slo-Foam™ down on a table and pinch the foam using your thumb and index finger, and then your thumb, index, and middle finger.
Another way to vary this type of exercise is to rotate your forearm when gripping and pinching.
Try gripping the foam with your palm up, then turn your palm down.
These exercises transfer into increased grip strength with your daily activities.
To review, set yourself a 3-5 minute timer. Manipulate the foam around in your hand, then squeeze. Repeat.
Don’t forget to throw a few thumb pinches in there.
While you’re at it, grip and pinch the foam with your forearm palm up and palm down.
Just have fun with it!
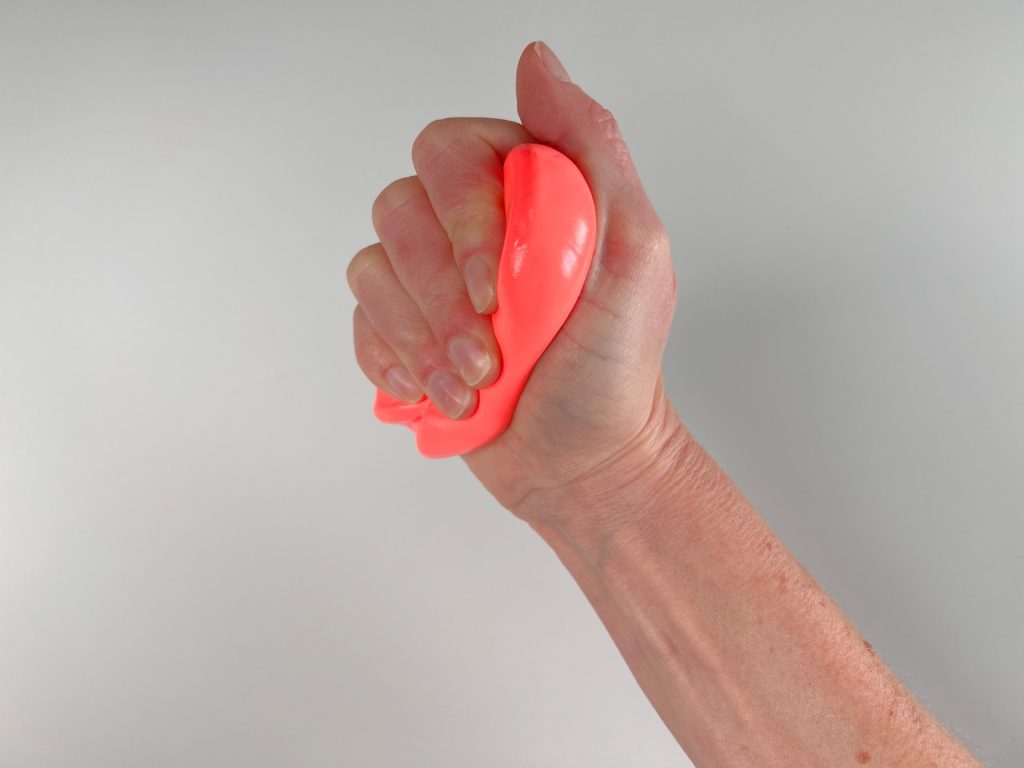
Build Grip Strength after a Distal Radius Fracture Exercise #4
Putty
A commonly used item in rehabilitation clinics to improve hand strength is therapy putty.
Keep in mind there are different colors of putty which indicate different resistance levels depending on the brand. Purchase the level, or levels, right for you.
During the early stages of grip strength after a distal radius fracture, you may want to stick with extra soft or soft putty.
I’ll be using the soft resistance red putty in this post.
Begin strengthening with the Putty
Warm up your fingers by lightly gripping the putty. Try to make a full fist by curling, or bending, all three finger joints around the putty.
Then just like in exercise 3, manipulate the putty around in your hand and squeeze.
Continue to move the putty around, allowing all your fingers to work together. Give it a good squeeze.
Make sure all your fingers and your thumb are gripping through the putty.
Add different types of fists to strengthen your hand
Now to add a little variety, we want to work on different fists. A straight fist is when you keep your DIP joints, aka the tips of your fingers straight, but bending the other 2 joints.
Squeeze through the putty using a straight fist.
Manipulate the putty around and perform 3-5 more straight fists.
Next try for a hook or claw fist. This is when the large knuckles are straight and the DIP and PIP joints, the tip and middle joint of the fingers, are flexing.
To do this one, you may need to use your other hand to hold the putty in place with your other hand.
Again repeat 3-5 claw or hook fists in the putty.
Upgrade this exercise by doing all 3 fists.
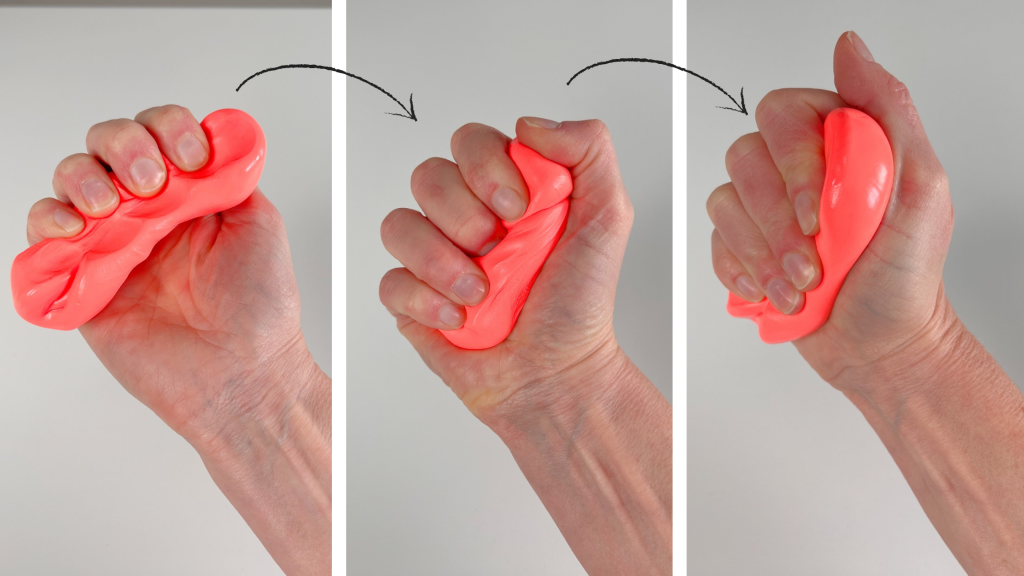
Start with a hook fist then bend your fingers down into a full fist. Finally transition into a straight fist.
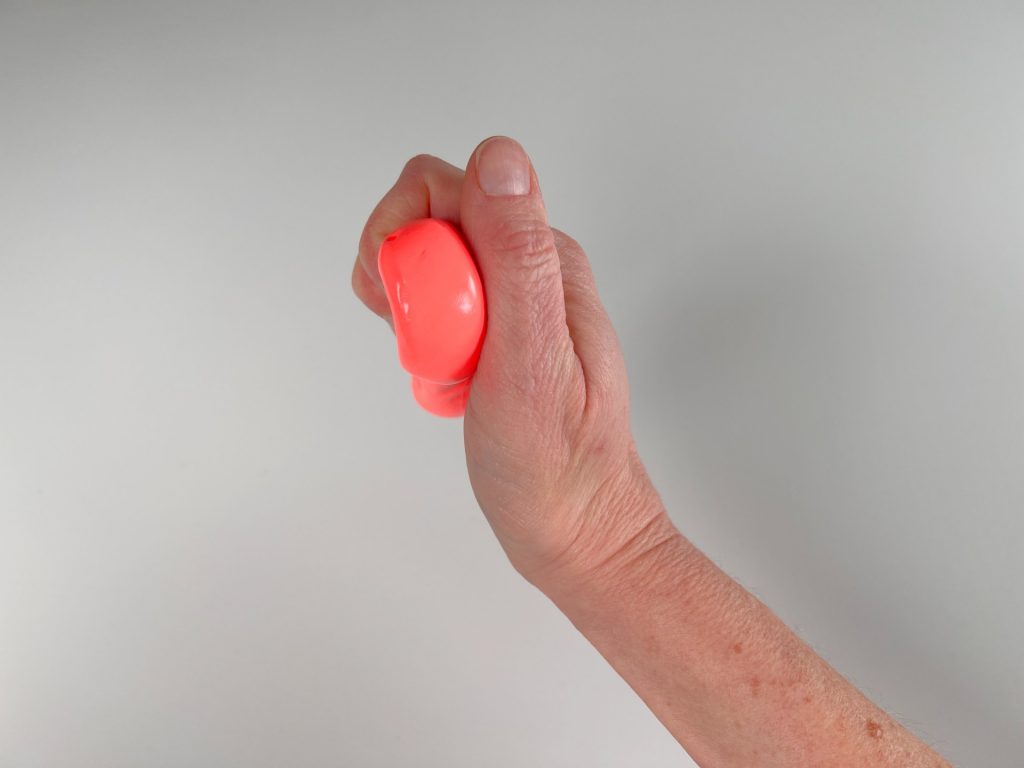
A bonus exercise is putty pinches with your thumb. Remember your thumb can also build grip strength after a distal radius fracture.
To try this one, roll the putty out on a table, sort of like a hot dog.
Use your index and thumb to pinch through the putty. Repeat along the length of the putty.
Fortunately, there are many activities and exercises you can do with the putty.
In fact, follow along in this Finger and Thumb Strengthening with Putty video for more helpful putty strengthening exercises.
Keep in mind, it can be very easy to overdo it with the putty.
So always make sure you set a timer for 3-5 minutes.
Build Grip Strength after a Distal Radius Fracture Exercise #5
Flexbar
At last, beginner grip strength exercise 5 will require a Flexbar. The yellow or a red resistance level is a great place to start when you want to build grip strength after a distal radius fracture.
In this blog post, I will use the red medium resistance Flexbar.

To start strengthening with the Flexbar
Place the bar in a horizontal position. Grasp with both hands.
Twist the bar forward with the hand you want to strengthen. This movement requires grip and wrist flexion strength. Hold for 2 seconds, then slowly return back to your starting position.
Do not let the bar bounce back.
Repeat 10-20 repetitions.
Next, grasp the bar and twist your hand backwards. Now you’re working on grip and wrist extension strength.
Make sure your other hand is not moving or twisting the bar during these exercises. It is simply holding the bar in place.
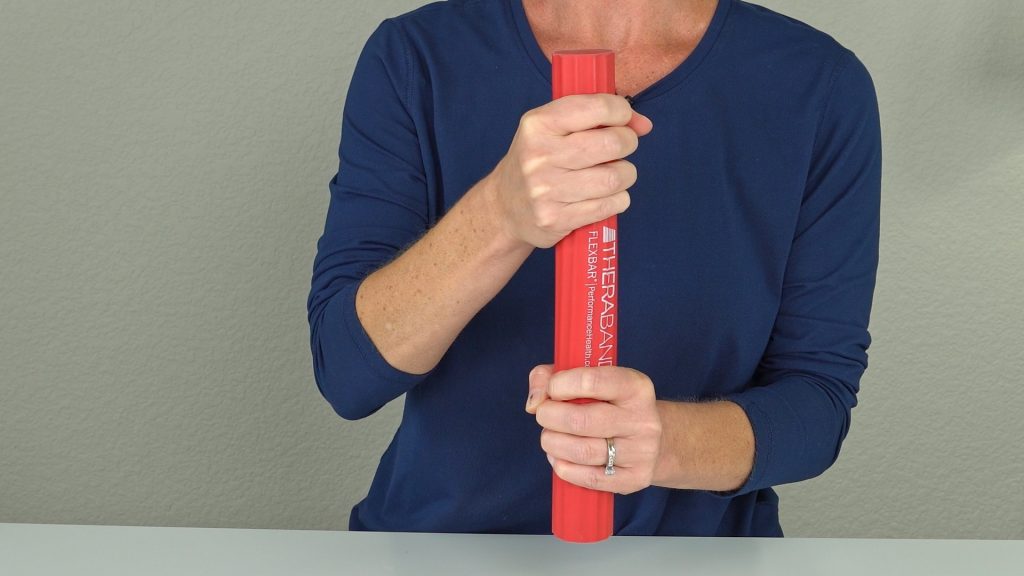
Now turn the Flexbar vertical, then grip and twist in wrist flexion and extension as explained above. Repeat 10-20 repetitions.
Changing the position of the bar will boost the difficulty level.
Not to mention, simulate daily activities that you may still be struggling with.
There are many exercises you can do with the Flexbar. Here’s a follow along Hand and Wrist Strengthening Exercises with Flexbar: Follow Along Workout.
Come join me!
Looking for more strengthening exercises?
If you liked these hand strengthening exercises, you can get more like these in my Get A Grip program.
It’s a self-paced online program created by a hand therapist. There are over 30 videos that progress you from beginner stretching and grasping to more advanced strengthening exercises.
Best of all, you’ll have unlimited access because there shouldn’t be a time limit on building strong healthy hands.
Kickstart your finger motion and grip strength with my GET A GRIP Program