In this blog post, I’m going to share 3 secrets to stretching your fingers the right way.
If you’ve suffered from a broken finger, or hand injury, you might find yourself struggling with getting your finger mobility back.
Maybe you’ve been stretching and exercising your finger, or fingers, for what feels like forever. But you’re not noticing an improvement and feel like you are just spinning your wheels.
Will the stiffness ever go away?
Yes, it can, but don’t waste any more time doing it the wrong way. This will only cause more pain and swelling.
Losing what little mobility you think you gained.
Start regaining your mobility faster with these 3 secrets to stretching your fingers.
If you prefer video, you can watch 3 Secrets to Stretching Your Fingers the Right Way from my YouTube channel here:
The 1st Secret to Stretching Your Fingers the Right Way is:
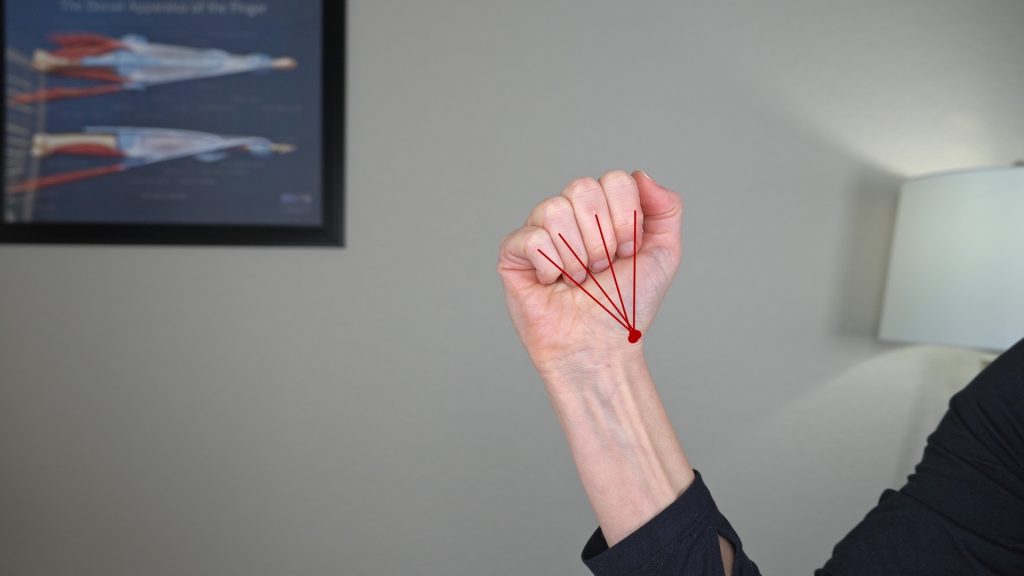
Stretching at the Right Angle.
This is also referred to as the Proper line of pull.
This means to perform the stretch in a way that follows the natural direction of your fingers. When you stretch your fingers you should be stretching them towards the base of your thumb.
Just look at the way your fingers move with your uninjured hand.
Every finger moves at an angle toward your thumb.
This is completely normal!
So when you are stretching your fingers you want to make sure you are following that same natural line of pull.
This helps to maximize the effectiveness of the stretch because pulling in the opposite direction, even slightly, can strain your ligaments.
Further adding stress and swelling to your healing finger. Therefore, not giving you the results you are looking for.
The 2nd Secret to Stretching Your Fingers the Right Way is:
Holding your Stretch for the Appropriate Length of time.
Of course, the right length of time to hold a stretch depends on several factors. Details such as which muscle, tendon or ligament you are stretching; if you had surgery and what structures are involved; if you are dealing with tight scar tissue, and more will help you decide.
As a general guideline, most people are advised to hold a stretch anywhere from 2-3 seconds up to 15-30 seconds.
Most of the time, this is enough for your muscles to relax and lengthen.
However, if your injury is many weeks, or months old, and you are not seeing an improvement then you may need to implement low load long duration stretching (LLLD).
Another similar term is LLPS, or low load prolonged stretching.
This is a type of stretching that involves holding a stretch for a longer duration of time, usually 1 minute, 5 minutes, even 30 minutes in some cases.
Using an ace wrap to stretch your fingers into flexion is one example.
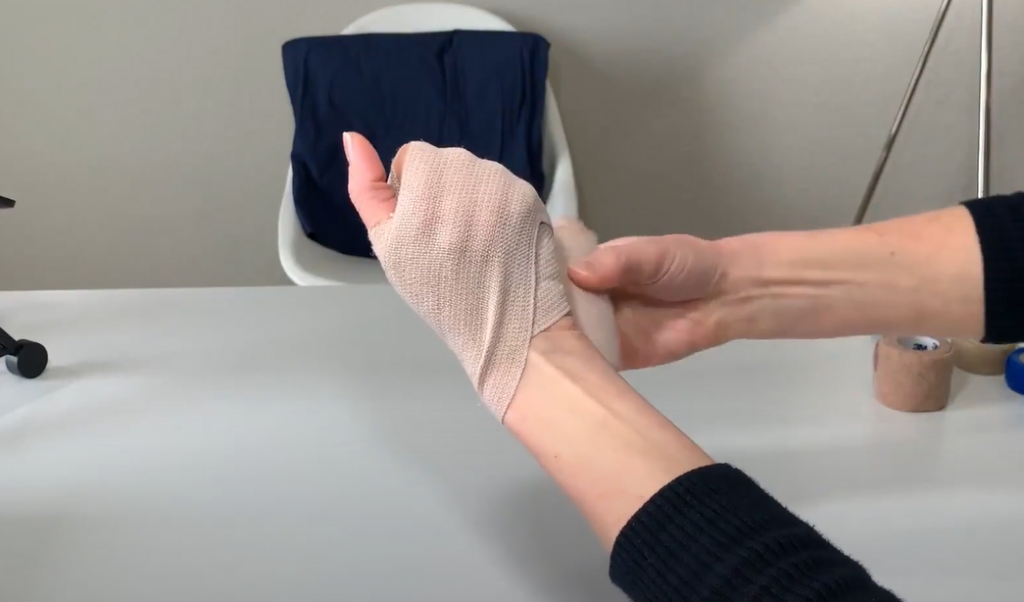
The term “low load” refers to the use of low levels of pressure during the stretch. AND low levels of pain, which helps to minimize the risk of injury, discomfort, and post stretch swelling.
So the bottom line is you may not be stretching your fingers long enough to see results.
Finally the 3rd Secret to Stretching Your Fingers the right way is:
Skin Mobility. Also known as Skin gliding.
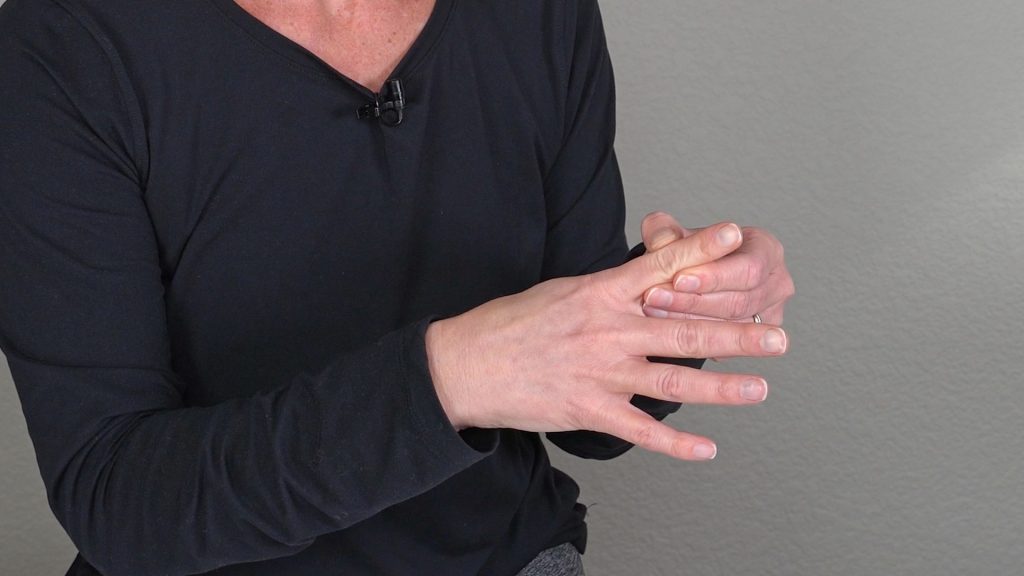
One way to determine if this technique could improve your range of motion is to simply compare your fingers to your uninjured fingers.
Do you notice the same amount of wrinkles at all your finger joints?
Is your finger swollen, is your finger shiny? These are all indicators that your skin is already tensioned.
And that’s probably assessing your finger straight, right? You haven’t even started bending or stretching your skin.
So when you stretch your fingers, the largest organ in your body (AKA your skin) could have a very powerful, and often painful, resistance against you.
One of the best kept secrets to stretching your fingers is to improve your skin mobility.
To do this:
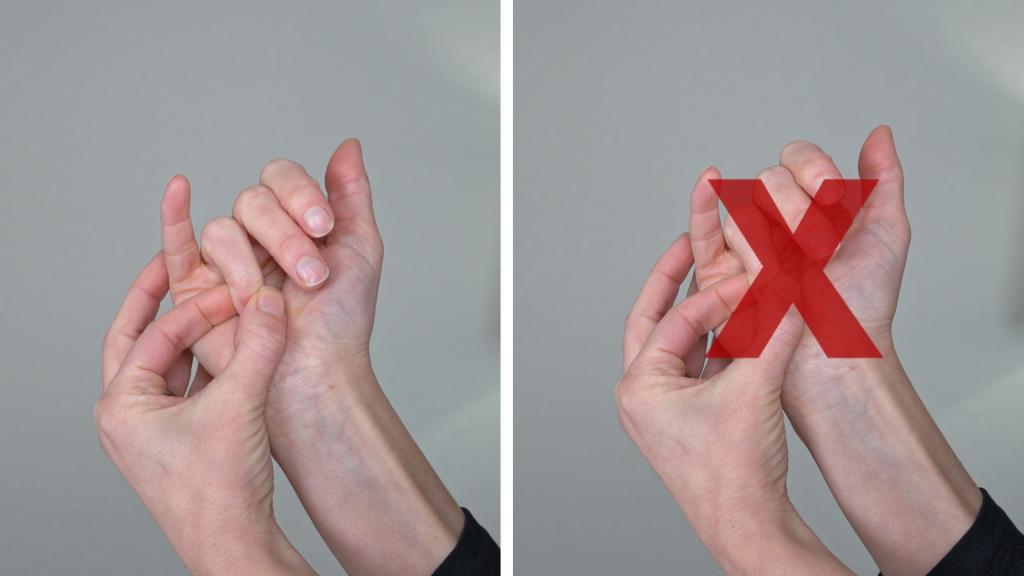
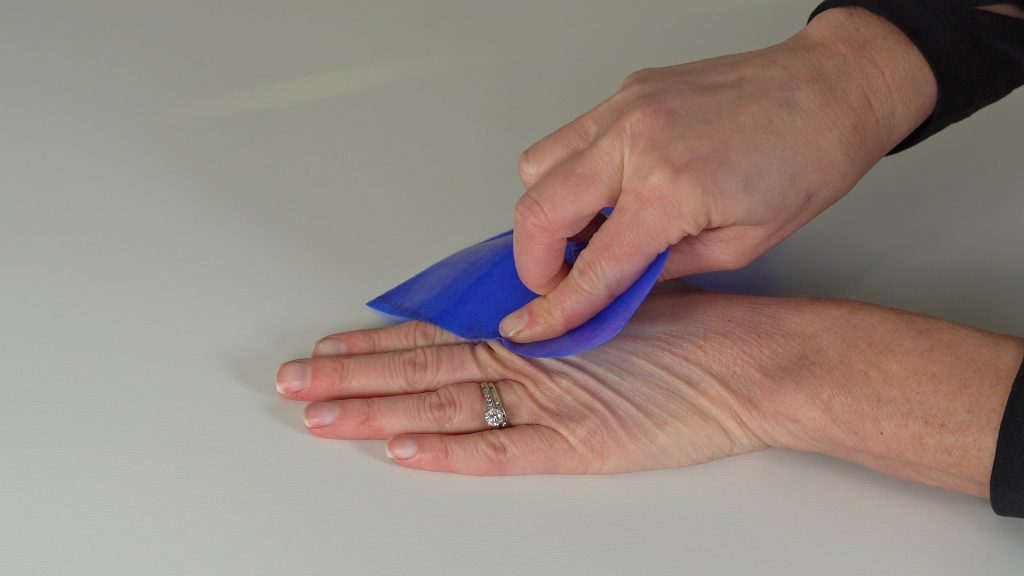
Locate the area of restriction on your finger or hand. This could be a scar, tight, blanched, or shiny looking skin. Gently apply light pressure to the area with your fingers or with a non-slip material such as Dycem or Theraband.
Next you want to gently move your skin in a smooth and repetitive manner, in the direction of the underlying tissue.
This will help to separate the skin from whatever it is getting stuck on and reduce adhesion.
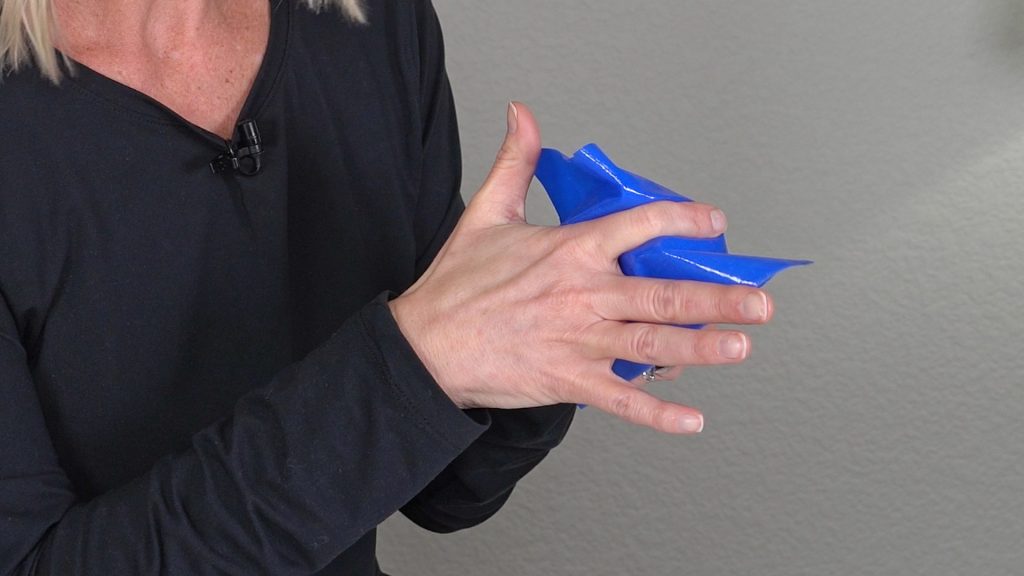
Eventually you want to start moving your finger joints at the same time as you are performing the skin gliding technique to continue to reduce the restriction.
Make sure you are NOT overly aggressive or forceful.
You are not doing a deep massage to a shoulder or a knee. Fingers do not have all the fat or muscle of other body parts.
Aggressive movement can be counter productive.
You are not looking to cause skin damage.
Conclusion:
I hope you found these 3 secrets to stretching your fingers the right way helpful. Whether you start using the proper line of pull, increase the length of time you hold your stretch, or implement skin gliding techniques you are sure to notice improvements in your mobility over time.
Keep in mind, it is so important to listen to your body and not push yourself too hard.
If you experience any pain or discomfort while stretching, it is best to seek advice from your doctor or certified hand therapist to create a custom stretching program for your particular case.
For more exercises to improve your finger range of motion and reduce your stiffness then checkout my Top 3 Finger Stiffness Exercises.